As a new parent, you’re navigating a world of firsts, and the mountain of baby bottles that needs cleaning can feel like one of your biggest daily challenges. It’s 3 AM, the baby is finally asleep, and you’re faced with a sink full of parts. You glance at your dishwasher and wonder, “Can this machine really be safe enough for this precious cargo?” The short answer is a resounding yes. Learning How To Sanitize Dishwasher For Baby Bottles is not just a time-saver; it’s a game-changer for ensuring your baby’s feeding gear is hygienically clean. Let’s walk through how to turn your trusty kitchen assistant into your best ally in the bottle-washing battle.
Why Your Dishwasher is a Sanitizing Superhero
First, let’s clear up a common confusion: there’s a big difference between cleaning and sanitizing. Cleaning removes visible grime and food particles. Sanitizing goes a step further by using high heat to eliminate 99.9% of bacteria and germs. Your dishwasher is uniquely equipped for this job, and here’s why.
Many modern dishwashers come with an NSF/ANSI 184 certified “Sanitize” cycle. This isn’t just a fancy button. This certification means the dishwasher is proven to reach a final rinse temperature of at least 150°F (66°C), a critical threshold for killing common household germs like E. coli and Salmonella. This is a level of heat that’s simply unsafe and unattainable when washing by hand.
“A common mistake people make is assuming a clean-looking dishwasher is a sanitizing one. If your filter is clogged with old food particles, you’re essentially washing your baby’s bottles in a dirty soup. Regular maintenance is non-negotiable for true sanitization.” – Maria Rodriguez, Lead Appliance Technician
Using your dishwasher not only saves you from chapped hands and hours at the sink but also provides a level of microbial clean that’s difficult to replicate manually.
Getting Started: The Pre-Wash Checklist
Before you start loading bottles, a little prep work goes a long way in ensuring a perfect, sanitized result. Don’t skip these steps!
- Check for “Dishwasher Safe” Labels: Most baby bottles today are made from dishwasher-safe, BPA-free plastic or glass. However, always double-check. Using a non-safe plastic could cause it to warp, melt, or leach chemicals.
- Disassemble Everything: This is crucial. Nipples, collars, valves, and bottles must all be separated. Trapped milk residue is a breeding ground for bacteria, and water jets can’t reach it if the bottle is assembled.
- Give a Quick Rinse: You don’t need to scrub, but you must rinse out any remaining milk. Old milk can curdle and be difficult for the dishwasher to remove completely. A quick rinse with cool water prevents milk proteins from “cooking” onto the surface.
The Ultimate Guide on How to Sanitize Dishwasher for Baby Bottles
Ready to get started? Follow these steps for a safe, effective sanitizing cycle every time.
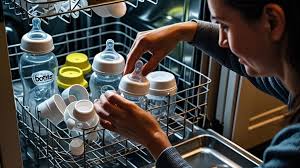
- Load It Right:
- Place bottles upside down on the top rack. The top rack is further from the heating element, which is safer for plastic items.
- Put nipples, collars, and other small parts in a dishwasher-safe mesh bag or a closed-top basket. This prevents them from falling through the rack and melting on the heating element below. Trust me, the smell of melted plastic is one you never forget.
- Avoid overcrowding. Water and detergent need to circulate freely to do their job.
- Choose Your Detergent Wisely:
- Opt for a high-quality detergent without dyes or heavy fragrances. Pods or powders often dissolve more completely than some gels, reducing the chance of residue.
- Never use regular dish soap. It will create a mountain of suds that can overflow from your dishwasher and damage the machine.
- Select the Perfect Cycle:
- The best option is a dedicated “Sanitize” or “Sani-Rinse” cycle. This is your gold standard.
- If your dishwasher lacks a Sanitize option, choose the cycle with the highest temperature setting, often called “Heavy Duty” or “Pots & Pans.”
- Crucially, you must also select the “Heated Dry” option. The prolonged high heat of the drying cycle is a key part of the sanitizing process, helping to kill any lingering germs. Air-drying won’t provide the same benefit.
- Unload with Clean Hands: Once the cycle is complete, wash your hands thoroughly before removing the bottles. Place them on a clean drying rack or paper towel to cool completely before reassembling.
What If My Dishwasher Doesn’t Have a Sanitize Cycle?
Don’t worry, you can still achieve a very high level of clean. If you don’t have a specific “Sanitize” button, your goal is to maximize heat.
Your best bet is to use a combination of the hottest water wash cycle available (like “Heavy” or “High-Temp Wash”) plus the heated dry setting. While it might not be NSF-certified, this combination will expose the bottles to sustained high temperatures that are far more effective than hand washing. You can also boost your home’s hot water heater to 120°F (49°C), the standard recommended temperature for effective dishwasher performance.
|
Our Picks for the Best Dishwasher in 2026
As an Amazon Associate, we earn from qualifying purchases.
|
||
| Num | Product | Action |
|---|---|---|
| 1 | AIRMSEN Portable Countertop Dishwashers, 5 Washing Programs Mini Dishwashers with 5 L Built-in Water Tank and Double-layered Glass Door, No Hookup Needed for Home, Apartments & RVs |

|
| 2 | NOVETE Portable Countertop Dishwashers, Compact Dishwashers with 5L Built-in Water Tank & Inlet Hose, 5 Washing Programs, Baby Care, Air-Dry Function and LED Light for Small Apartments |
|
| 3 | HAVA 2025 NEW Upgraded Countertop Dishwasher with Water Softener and Enhanced Energy Efficiency, Portable Dishwasher with 8 Wash Programs, Child Lock & Delayed Start Function, No Installation Needed |
|
| 4 | AIRMSEN Portable Countertop Dishwashers, 5 Washing Programs Mini Dishwashers with 5 L Built-in Water Tank and Double-layered Glass Door, No Hookup Needed for Home, Apartments & RVs |
|
| 5 | Farberware Portable Countertop Dishwasher with 5-Liter Built-in Water Tank - 5-Program System for Home, RV, and Apartment - Wash Dishes, Glass, and Baby Products |
|
| 6 | COMFEE\' Countertop Dishwasher, Portable Dishwasher with 6L Built-in Water Tank, Mini Dishwasher with More Space Inside, 7 Programs, UV Hygiene& Auto Door Open, for Apartments, Dorms& RVs, White |
|
| 7 | COMFEE\' Portable Mini Dishwasher Countertop with 5L Built-in Water Tank for Apartments& RVs, No Hookup Needed, 6 Programs, 360° Dual Spray, 162℉ High-Temp& Air-Dry Function |
|
| 8 | HAVA Countertop Dishwasher, 6 Programs Portable Dishwashers with 5L Built-in Water Tank, No Hookup Needed, Baby Care & Air-Drying Function for Apartments and RVs |
|
| 9 | HAVA Countertop Dishwasher with Water Softener and Enhanced Energy Efficiency, Portable Dishwasher with 8 Wash Programs, Child Lock & Delayed Start Function, No Installation Needed - Misty Lilac |
|
| 10 | COMFEE\' Portable Mini Dishwasher Countertop with 5L Built-in Water Tank for Apartments& RVs, No Hookup Needed, 6 Programs, 360° Dual Spray, 162℉ High-Temp& Air-Dry Function |
|
Keeping Your Sanitizing Station Spotless
You can’t sanitize bottles in a dirty machine. A clean dishwasher is a healthy dishwasher. Performing these simple maintenance tasks ensures your machine is always ready for duty.
How Often Should I Deep Clean My Dishwasher?
A good rule of thumb is to give your dishwasher a deep clean once a month, especially when you’re frequently using it to sanitize baby gear. This prevents the buildup of limescale, grease, and food debris that can harbor bacteria and cause odors.
The Best Natural Cleaning Method: Vinegar and Baking Soda
This one-two punch is simple, effective, and chemical-free.
- Clean the Filter: First, remove the dishwasher filter (usually at the bottom of the tub) and wash it with hot, soapy water to remove any trapped gunk.
- The Vinegar Cycle: Place a dishwasher-safe bowl containing one cup of white vinegar on the top rack of the empty dishwasher. Run a full, hot water cycle. The vinegar will break down grease and limescale.
- The Baking Soda Finish: After the vinegar cycle is done, sprinkle one cup of baking soda across the bottom of the dishwasher. Run a short, hot water cycle. This will help neutralize any lingering odors and flush out any debris the vinegar loosened.
Your dishwasher will be sparkling clean and ready to tackle the next round of bottles.
Frequently Asked Questions
Q: Can I put all types of baby bottles in the dishwasher?
A: You can put any bottle, plastic or glass, that is explicitly labeled “dishwasher-safe” in the machine. Placing non-safe items in the dishwasher can cause them to warp or degrade. Always check the manufacturer’s instructions.
Q: Do I need to sterilize bottles after washing them in the dishwasher?
A: If you use the “Sanitize” cycle or a high-temp wash with heated dry, you do not need to sterilize the bottles afterward. The dishwasher’s sanitizing process effectively accomplishes the same goal by using sustained high heat to kill 99.9% of germs.
Q: I’m worried about soap residue. How can I avoid it?
A: To avoid residue, don’t use too much detergent, and consider using a rinse aid. Hard water is a common cause of residue; running a monthly cleaning cycle with vinegar can help dissolve mineral buildup.
Q: Is it safe to wash plastic baby bottle parts on the bottom rack?
A: No, you should always place plastic items on the top rack. The bottom rack is closest to the heating element, and the intense heat can cause plastic to warp or melt, even if it’s labeled dishwasher-safe.
Q: How hot does the water need to be for sanitizing?
A: For a cycle to be NSF-certified for sanitation, the final rinse must reach at least 150°F (66°C). This high temperature is what effectively kills bacteria and germs.
Your Partner in Parenthood
Learning how to sanitize dishwasher for baby bottles effectively can lift a huge weight off your shoulders. It transforms a tedious, daily chore into a simple, automated process you can trust. By following the right steps—pre-rinsing, loading correctly, and choosing the high-heat cycles—you can be confident that you’re providing clean, safe feeding equipment for your little one. So go ahead, load up that machine, press start, and reclaim a little bit of your precious time. You’ve earned it.